User's Guide
The Labs Workbench is currently in beta testing. Documentation is subject to change.
This document refers to the Labs Workbench demonstration instance available at https://www.workbench.nationaldataservice.org.
Introduction
This User's Guide refers to the demonstration instance of NDS Labs Workbench available at http://www.workbench.nationaldataservice.org.
For more information, see What is NDS Labs Workbench?
Registration and approval
This section describes the NDS Labs Workbench account registration and approval process.
Register for an account
To register for an account, select  or
or  and enter your registration information:
| Field | Description |
|---|---|
| Full Name | Your full name will be considered during the account approval process. |
| Email Address | Email address will be verified and used for limited communications. |
| Organization | Your organization will be considered during the account approval process. |
| Description | Please provide a brief description about why you are requesting access to the NDS Labs Workbench. |
| Username | Unique username will be used for login. |
| Password | Must be longer than 6 characters. |
Email verification
After submitting your account registration information, should should receive an email from the NDS Labs team with the subject "Email address verification". Click the link in this message to verify your email and complete the registration process. After your email address has been verified, your registration will be reviewed and approved by the NDS Labs team.
Account approval
The NDS Labs team will review your registration request and get back to you within 5 business days. You will be notified whether your request has been approved or denied. See our Frequently Asked Questions for information about who is able to access the service.
Resource Limits
Labs Workbench restricts resources allocated to user accounts and individual applications.
- Account resource limits: By default, each user account is allocated 12GB RAM, 4 cores, and 20GB of storage. If more resources are required, contact ndslabs-support@nationaldataservice.org.
- Application resource limits: Application developers are required to specify baseline resource limits for their services. User's can override these settings by cloning the official application. For more information, please see the "Resource Limits" section below. For developers interested in estimating resource requirements for services, please see the Developer's Guide.
Account Management
Login
After you receive your account approvel email, select the  link and enter your username and password.
Forgot password
To recover a forgotten password, on the page select the link. Enter your username and a password recovery email will be sent to the registered email address.
Change password
After logging in, select your username in the upper right-hand corner then the ![]() menu item.
menu item.
Logout
Select your username in the upper right-hand corner then the ![]() menu item.
menu item.
Application Dashboard
Select the  link you to manage your applications. From this page you can add, rename, configure, start and stop applications. Once an application is started, you can view logs and access a console. You can also enable or disable basic authentication on the running application.
Adding an application
To add a new application, select  . This will take you to the application catalog, where you can search for or add your own applications. Select the
![]() for an application to add it to your dashboard.
for an application to add it to your dashboard.
Configuring an application
Official applications are added with reasonable default settings when possible. However, you may want to customize settings or add optional services. Note that some services require configuration.
Once added to your dashboard, to configure a service, select the ![]() button.
button.
| Tab | Description |
|---|---|
| Environment | Customize or override any configuration options offered by the service or add your own custom environment variables that will be set in the running container. |
| Data | Override default data directories or mount custom directories from your home directory. |
| Docker | Select the Docker image to be used. |
Adding optional services
Some applications offer optional configurable dependencies. To add an optional service, select the button. You will be prompted to enter any required configuration information.
Launching an application
To start or launch the application, select  .
.
During the startup process, you may notice the following:
| Status | Description |
|---|---|
| The service is currently stopped or waiting for a dependent service to start. |
| The service is starting. You can view logs during the startup process. Please note, for new services the startup process might include pulling images from Dockerhub. |
| The service entered an error state. View log files for more information. |
| The service is ready. |
| The service has an HTTP interface that can be access. Click on the endpoint link to access the running application. |


Viewing application logs
Select the ![]() icon to view logs for a running service. Logs include include output from the NDS Labs system as well as output written to standard out and standard error in the container. Note: some services may write to local logfiles that are only accessible via the console.
icon to view logs for a running service. Logs include include output from the NDS Labs system as well as output written to standard out and standard error in the container. Note: some services may write to local logfiles that are only accessible via the console.
Viewing the running configuration
To view the running configuration of a service, select the ![]() icon. This allows you to view the running Docker image, any environment variables configured via the NDS Labs system and the internal IP address of services.
icon. This allows you to view the running Docker image, any environment variables configured via the NDS Labs system and the internal IP address of services.
Accessing the endpoint
For services that expose web-based interfaces, select the ![]() icon to access them. Note, if application security is enabled you will be prompted to enter your username and password. For non-HTTP services, please see the "Remote access" section below.
icon to access them. Note, if application security is enabled you will be prompted to enter your username and password. For non-HTTP services, please see the "Remote access" section below.
Console access
You can access the console of any running container by selecting the ![]() icon. This is a very basic console and always defaults to the Bourne shell "sh".
icon. This is a very basic console and always defaults to the Bourne shell "sh".
Password protection
To prevent unauthorized access to running applications, password protection is enabled by default. Select the ![]() or
or ![]() icons to enable/disable password protection.
icons to enable/disable password protection.
- Password protection is optional for official services that have their own registration process and do not use default administrative passwords
- Password protection is required for all user-defined services at this time.
- Note: currently password protection requires you to enter your account username and password and can only be changed when the application is stopped.
Renaming an application
To rename a stopped or running application, select the ![]() icon. This only affects the name of the service displayed on your dashboard.
icon. This only affects the name of the service displayed on your dashboard.
Your home directory
Each Labs Workbench account has a "home" directory that is mounted to every running container under /home/<your account name>. An integrated file manager allows you to upload and download data from your home directory. You can also copy data from inside running containers/applications to your home directory.
File Manager
Select the  link to launch the integrated file manager. Using this interface (Cloud Commander) you can create, move, rename, and move files and folders. You can also upload files from your local system or a variety of cloud-based storage providers including Google Drive, Dropbox and box.
Console access
The Cloud Commander file manager also provides console access to the Labs Workbench system. Select the  icon to access your home directory via console.
Mounting folders
NDS Labs supports mounting folders from your home directory into any running container. While the application is stopped, select the ![]() icon and select the "Data" tab to add custom mounts. You can add new mounts or override existing mounts in the container.
icon and select the "Data" tab to add custom mounts. You can add new mounts or override existing mounts in the container.
Application catalog
To access the application catalog, select the link. This will display the application catalog containing both official and your own custom application specifications.
Searching and filtering
Enter a search term or select a tag from an existing application in the catalog to filter the application list.
Official vs user-defined applications
Applications from the official NDS Labs system catalog are indicated by the icon. These applications have been reviewed and approved for use by all users. Your custom application specifications are indicated by the
  icon. These are viewable only by you. You can share specifications with other users by exporting the JSON specification. You can recommend applications to the NDS Labs team by issuing a pull request to the ndslabs-specs Github repository.
Adding your own application specification
To add your own application specification select  . See the "Application Specification" section below for more information about creating your custom application.
Importing an application specification
To import an application specification in valid JSON format, select  . This is an easy way to share your applications with other users.
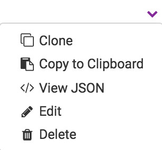
Application menu
The application menu is available by selecting ![]() for a given application. From this menu you can clone, copy, view, edit, or delete an application specification.
for a given application. From this menu you can clone, copy, view, edit, or delete an application specification.
Editing an application specification
To edit a user-defined application, select![]() . Note that you cannot edit system services. To edit a system service, clone it first.
. Note that you cannot edit system services. To edit a system service, clone it first.
Cloning an application specification
To copy or clone an application specification, select ![]() . You can clone your or system applications.
. You can clone your or system applications.
Deleting an application specification
To delete an application specification, select ![]() . You can only delete your applications.
. You can only delete your applications.
Sharing your application specification
To share your application with other users, use![]() or
or![]() to share the JSON specification.
to share the JSON specification.
Adding your application to the official catalog
Copy your specification in JSON format and make a pull request to the ndslabs-specs Github repository.
Application specification
This section describes the application specification pages and fields.
Application Details
| Field | Description |
|---|---|
| Short Name | A unique key for your service. This is usually the name of the .json file in the ndslabs-specs repo. This key is used in the construction of environment variables and host names. |
| Display Name | The name of your application as displayed in the Labs Workbench catalog. |
| Logo | A 64x64 logo for your application displayed in the Labs Workbench catalog. We recommend linking to an image attached to your application information page in the NDS Wiki. |
| Information | Link to an information page in the NDS Wiki. Please follow the template guideline. |
| Maintainer | Optional maintainer email address. |
| Description | A one sentence description of your application displayed in the Labs Workbench catalog. |
| Default Access |
|
| Keywords | Select keywords from a predefined vocabulary. Suggest changes to the vocabulary by contacting us or issuing a pull request to the ndslabs-specs repo. |
| Registry | Currently only docker.io is supported. |
| Image Name | The name of your image in Dockerhub |
| Image Tags | One or more image tags in Dockerhub |
Command/Arguments | Optional commands and arguments that override default container behavior. |
| Readiness probe | A way to test whether your application is ready to receive user requests. Readiness probes can be either TCP or HTTP
|
Dependencies
A central feature of the Labs Workbench service is the ability to specify dependencies between services. Our approach is compatible with Docker Compose linking, but relies on the environment variables, not /etc/host entries (although DNS support is expected in a later release). Of course, services must be "dependency aware" – that is, they must explicitly recognize and connect to each other. This is achieve by 1) starting dependencies before the dependent service and 2) injecting environment variables into the dependent service.
For example, the Clowder service specifies MongoDB as a required dependency. At startup, the Clowder container has the following environment variables available:
$ env | grep ^MONGO
MONGO_PORT_27017_TCP_ADDR=10.254.2.239
MONGO_PORT_27017_TCP_PORT=27017
Services can be either required or optional.
Environment
The Environment tab allows you to specify configuration settings for your application via environment variables. These settings can be made available to the user during configuration and are set in the container at startup.
| Field | Description |
|---|---|
| Name | Variable name in standard format (e.g., ENV_VAR) |
| Label | Label displayed in the configuration page |
| Default value | Default value |
| Default value type |
|
| Can override? | If checked, the user can override this setting. If unchecked, the value is set in the container. |
| Is Password? | If checked, the field will be displayed as a password. If unchecked, a textbox is displayed |
Data
This is equivalent to the VOLUME Dockerfile instruction. If specified, the Labs Workbench system will automatically create and mount a directory in the user's AppData directory to the container. This provides data persistence across service restarts.
Ports
This is equivalent to the EXPOSE Dockerfile instruction. If specified, the Labs Workbench system will create an endpoint for the service. Combined with the service "Default Access" setting, this will either be a publicly accessible hostname or an internally accessible IP address.
Resource Limits
For efficient resource utilization, the Labs Workbench system requires application developers to specify default resource limits. These are the starting and maximum CPU and memory requirements for the service.
| Field | Description |
|---|---|
| CPU Default | Increment at which CPU resources will be requested for this application |
| CPU Max | Maximum total CPU required by this container |
| Memory Default | Increment at which memory resources will be requested for this application |
| Memory Max | Maximum total memory used by this application |
Development
The development section allows you to specify development environments and source code repositories associated with your service. For more information, see the Development Environments section below.
| Field | Description |
|---|---|
| Developer environment | Pre-configured development environment |
| Repositories | Links to your SCM repositories. |
Development environments
One of the key features of the Labs Workbench is the ability to create pre-configured cloud-based development environments for your services. This allows NDSC community members to quickly explore your codebase and begin customization without the usual lengthy developer setup process process. Often development environment configurations are the knowledge of a few or described in lengthy and sometimes out-of-date Wiki pages.
With Labs Workbench, you can provide pre-configured development containers for community members.
General purpose development environments
General purpose development environments are baseline environments to support a specific programming language (e.g., Java) or class of application (e.g., Java WebApps).
Application-specific development environments
Application specific development environments extend general purpose environments with dependencies required by a particular application. For example the pyClowder Python development environment contains packages required for pyClowder development.
Remote access
Cloud-based IDEs are great, but often developers want to code locally and connect to remote services. Labs Workbench uses the Chisel HTTP tunnelling service to support remote access to services running in your account. Remote access requires the following:
- Start your target services in Labs Workbench
- Start the HTTP tunneling (Chisel) service
- Download the appropriate Chisel client
- Run the Chisel client to create an SSH tunnel from your local system to the remote service
For example:
chisel client --auth=user:password http://your-chisel.test.nationaldataservice.org/ localhost:5672:10.254.68.0:5672
This connects the Chisel client to your Chisel server running in Labs Workbench and creates a tunnel from localhost:5672 to a remote RabbitMQ instance.
Docker support
Almost all Labs Workbench services (including infrastructure) are run via Docker containers. User services must be published as Docker images. Therefore, Labs Workbench users must have access to create, run, and publish Docker images via Labs Workbench.
To use your own instance of Docker, start the "Docker" application in Labs Workbench. This will provide console access to your home directory. You can docker build, tag, publish, and run all in your own isolated space.
Backing up your data
Important data should never be stored on the Labs Workbench environment. For disaster recovery purposes, user data is backed-up each night. However, this backup is intended for full-system disaster recovery, not individual user data recovery.
To download or backup copies of your own account data, please follow these steps:
- Open the File Manager application
- Select the files or directories that you want to download, right-click and select "Pack".
- This will generate a tar.gz archive containing the selected files.
- Once the archive is created, right-click and select "Download" to download your data.
For advanced users, you can always use the "Console" feature, change directory to /home/username, and create an archive using your preferred tools. These archives can be downloaded as above, or transferred to remote systems via tools such as sftp or scp.
Troubleshooting
TBD: Common problem cases:
- Application won't start (Error)
- Quota reached
- "No Data Available"